In today’s digital world, signing documents and verifying your identity online has never been more important — or more convenient. But how exactly do you take and send a digital signature along with a photo? Whether it’s for signing contracts, submitting official IDs, or verifying your identity, mastering this process is a must. This guide will walk you through everything step-by-step, making it super easy and secure.
Digital Signatures and Photos
A digital signature is essentially the electronic version of the handwritten signature you’ve always used to authorize or approve documents. Instead of printing out a paper, physically signing it, and then scanning it back into your computer, a digital signature allows you to sign documents electronically with just a few clicks or taps. This process uses advanced encryption technology to protect your signature from tampering and verify your identity. Because of these security measures, digital signatures are legally recognized in the United States under laws like the ESIGN Act, making them just as valid as a traditional pen-and-paper signature.
Why Combine a Digital Signature with a Photo
Sometimes, having just a digital signature isn’t enough to fully confirm your identity. Because signatures alone can be copied or forged if someone gets hold of your image file, pairing your signature with a clear photo adds a critical layer of security. This photo serves as a visual proof that the signature belongs to you, making it much easier for the recipient to trust the document’s authenticity. Whether it’s a job application, a rental agreement, or a government form, having both elements helps to reduce fraud and ensure the person signing is physically present or properly verified.
This combination is particularly important in industries or situations where strong identity verification is required, such as banking, healthcare, and government services. Adding your photo alongside your digital signature also helps organizations comply with stricter regulatory standards and identity verification protocols. In short, the photo complements the digital signature by providing a visual identity checkpoint, making the entire process more secure and trustworthy.
Common Uses of Digital Signatures and Photos
Digital signatures and photos are widely used across many sectors and scenarios, thanks to their convenience and security benefits. Here are some of the most common situations where you’ll encounter them:
- Signing employment contracts or rental agreements: Instead of mailing paper contracts, employers and landlords often request digitally signed documents along with a photo ID to verify the signer’s identity instantly.
- Submitting identification for banking or government services: Banks and government agencies use digital signatures plus photos for opening accounts, applying for benefits, or renewing licenses to prevent identity theft.
- Approving documents in remote work environments: With more people working remotely, teams rely on digital signatures and photos to approve project plans, budgets, and official communications without meeting in person.
- Online notarization and legal paperwork: Many states now accept digitally notarized documents, which require the signer’s photo and digital signature to comply with legal standards.
In all these cases, digital signatures paired with photos create a smooth, secure way to handle official paperwork without the need for physical presence.
Preparing to Capture Your Digital Signature and Photo
Before you dive into taking your digital signature and photo, it’s important to get everything ready so the process is smooth and efficient. Preparation starts with having the right devices and tools at your fingertips and knowing what software you’ll use. This upfront work ensures that the signature and photo you capture look professional, clear, and ready for submission without needing multiple retakes.
Taking a bit of time to prepare also means you’ll avoid common pitfalls like blurry photos, unclear signatures, or incompatible file formats. Getting everything set up properly will help save time and frustration down the line, especially when submitting important documents where clarity and security are crucial.
Necessary Tools and Devices
To successfully capture your digital signature and photo, you’ll typically need the following:
- A smartphone, tablet, or computer with a camera: A good camera is essential to take a clear, well-lit photo of yourself or your handwritten signature.
- A touchscreen or a way to scan your handwritten signature: Devices like tablets or touchscreen laptops let you draw your signature directly on the screen. Alternatively, you can write on paper and scan it using a scanner or a smartphone camera.
- Reliable internet access: You’ll need internet connectivity to download apps, upload your signature and photo, and send documents securely.
- Apps or software for capturing signatures and editing photos: Whether free or paid, apps help you create, edit, and save your digital signature and photo in the correct format. These tools often also allow you to adjust brightness, crop images, or combine files for easier submission.
Having these tools ready before starting helps ensure the final files are professional and usable for whatever purpose you need.
Choosing the Right Software or App
There is no shortage of software and apps designed to help you create digital signatures and handle photos. Some are completely free, while others require subscriptions or one-time purchases. When selecting an app, prioritize ones that let you do more than just draw your signature—they should also support uploading scanned signatures and provide basic photo editing tools. This flexibility ensures you can create and adjust your digital files to look their best before sending.
Some of the most popular and trusted apps in the U.S. include Adobe Acrobat, which offers robust PDF signing and editing features; DocuSign, widely used for legally binding e-signatures; and HelloSign, known for its simplicity and user-friendly interface. Many smartphones and tablets also come with built-in editors for photos and PDFs that can be surprisingly powerful. Choosing the right app depends on your needs—whether it’s ease of use, security features, or compatibility with the recipient’s systems. Always check that the software you pick complies with legal standards in the U.S. to ensure your signatures are valid.
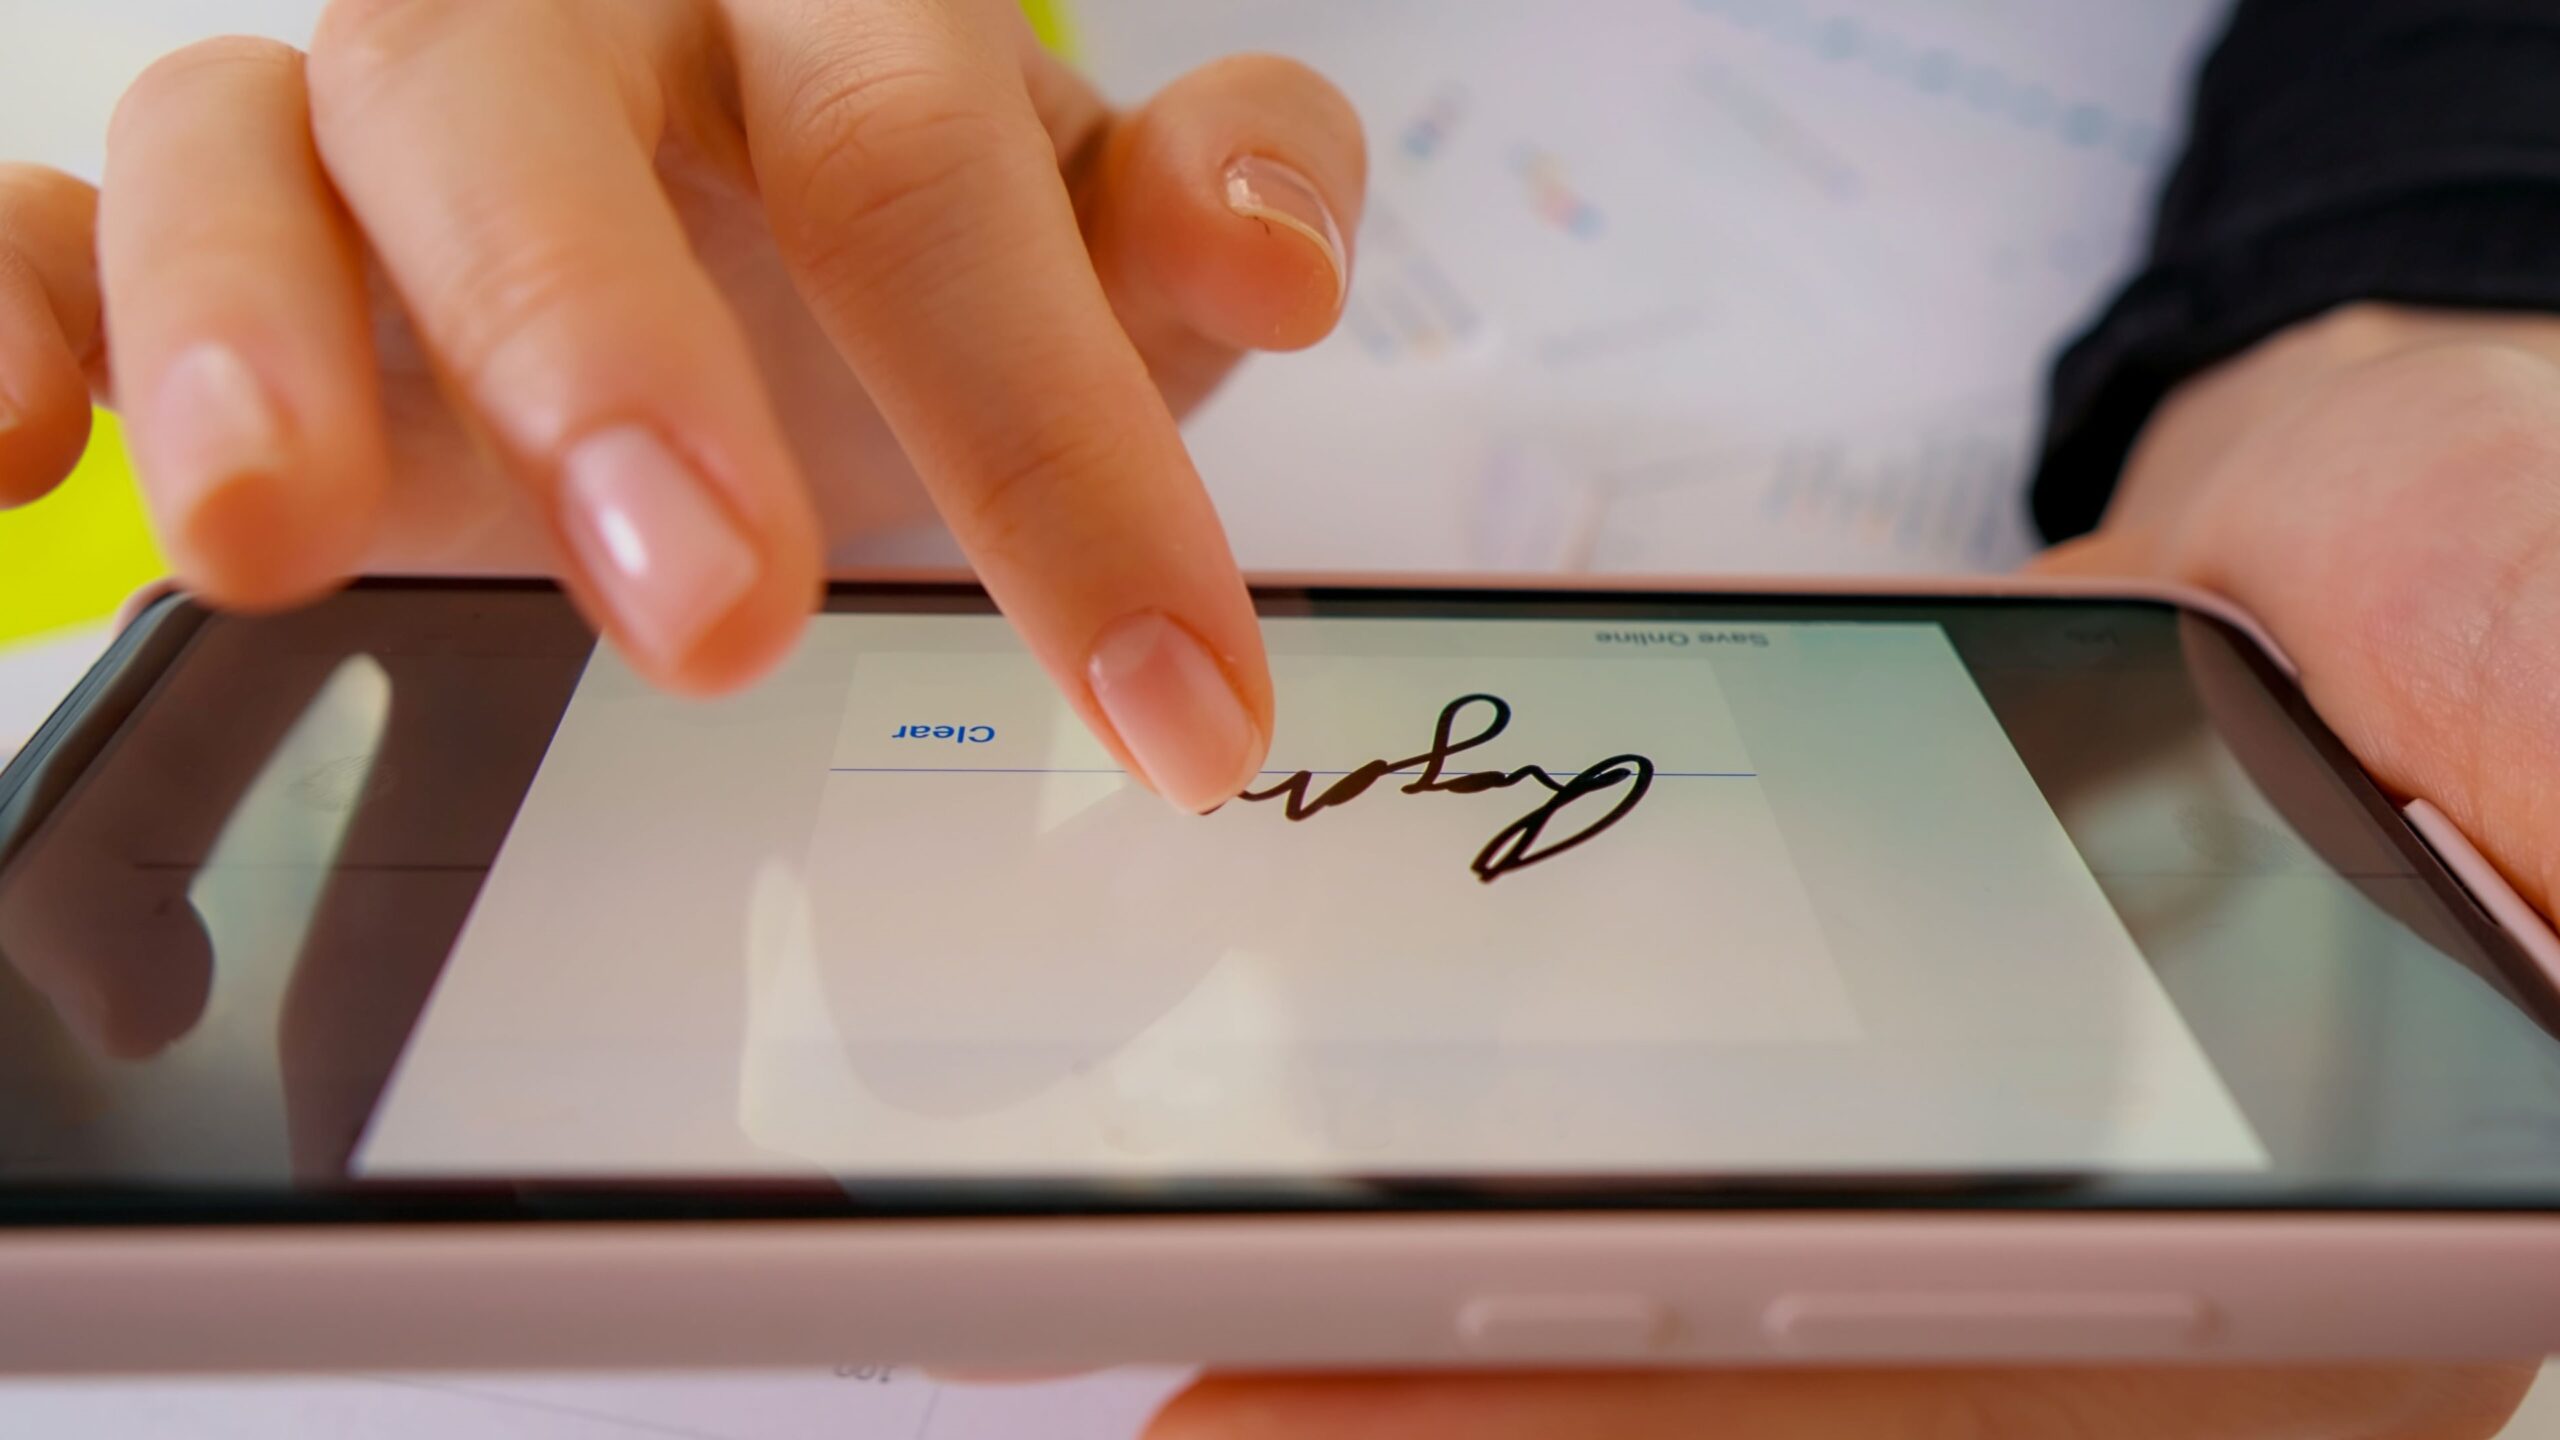
How to Take a Digital Signature
Capturing your digital signature can be surprisingly simple and flexible, depending on the device and tools you have available. One of the easiest ways is to draw your signature directly on a touchscreen device such as a smartphone or tablet. Using your finger or a stylus, you can create a natural, handwritten signature right on the screen. Most digital signature apps or platforms allow you to save this signature either as an image file or embed it directly into a document such as a PDF. This method is quick and convenient, perfect for users who want to avoid the hassle of printing and scanning.
Another common method involves writing your signature on a clean, white piece of paper using a dark pen, then scanning or photographing it with a good-quality camera. Once you have a digital image of your handwritten signature, you can use basic editing software to crop, enhance, or clean up the image. Saving your signature as a PNG file with a transparent background is often ideal for easy placement on documents. This approach works well for those who prefer the feel of pen and paper but want to digitize their signature for online use.
| Method | Device/Tools Needed | Advantages | Notes |
| Draw on Touchscreen | Smartphone or tablet + finger/stylus | Fast, natural feel; no scanning needed | Apps like Adobe Acrobat, DocuSign support this |
| Scan Handwritten Signature | Paper, dark pen, scanner or smartphone camera | Real pen feel; easy to digitize | Crop and edit for clarity; save as PNG/JPEG |
| Use Digital Pen or Stylus | Tablet + Apple Pencil or Wacom stylus | Precision and smooth lines; professional look | Requires compatible device and stylus |
Using a digital pen or stylus on a compatible tablet offers the most precision, allowing you to replicate the natural flow of your handwritten signature more accurately. Devices like an iPad with Apple Pencil or a Wacom tablet provide pressure sensitivity, which helps create a signature that looks very authentic. This method is favored by professionals or anyone wanting their signature to look polished and exact. Although it requires specific hardware, the end result is often worth the investment.
Tips for Creating a Clear Digital Signature
To ensure your digital signature looks clean and professional, start by using a smooth, bold pen or stylus. Thin or faint lines can get lost when scanned or viewed on screens, so opting for a thicker pen or a digital brush helps your signature stand out clearly. If you are writing your signature on paper to scan, make sure the background is completely white and free of any marks or shadows to avoid distractions.
It’s important to keep your signature size balanced—not too large to dominate the document, but not too small to be illegible. Finding the right size makes your signature look natural and fits well within forms or contracts. Lastly, always save your digital signature in a high-resolution format like PNG to maintain clarity. Low-resolution files often appear pixelated or blurry, which can look unprofessional or make verification harder.
How to Take a Proper Photo for Identification
A clear and well-lit photo is crucial when submitting a photo for identification purposes. The best lighting for such photos is natural daylight because it provides even, soft illumination without harsh shadows. Avoid taking your photo in direct sunlight or under fluorescent indoor lights that can cast unflattering shadows or change your skin tone. Also, pick a plain, neutral background—white, off-white, or light gray walls are ideal because they help your face stand out without distractions.
Lighting and Background
Natural daylight is the gold standard when it comes to taking identification photos because it evenly lights your face and creates a true-to-life image. However, be cautious not to stand in direct sunlight or near windows that cause bright spots or shadows. The goal is to have consistent lighting on your entire face without glare or dark areas. If natural light isn’t available, use a well-diffused artificial light source that mimics daylight and avoid overhead lighting that can cause unwanted shadows.
The background should be simple and plain to keep all focus on your face. Choose a solid color, preferably white or a very light tone, and make sure there are no objects, patterns, or other people behind you. This helps maintain professionalism and meets most official photo requirements for banks, government IDs, and employers.
Position and Angle
For the best identification photo, hold your device’s camera at exactly eye level. This helps ensure your face appears proportionate and undistorted. Keep your eyes looking directly into the camera lens and maintain a calm, neutral expression with your mouth closed or a slight natural smile. Avoid exaggerated facial expressions or head tilts, as these can cause the photo to be rejected for official uses.
Steer clear of selfies where the camera is held too low, too high, or at a sharp angle, as these distort your features and may give an unprofessional impression. Consistency in your photo’s angle and position is key, especially if the photo will be used for multiple official purposes or needs to pass strict ID checks.
Recommended Devices and Apps
Modern smartphones generally come equipped with high-quality cameras that are perfect for taking identification photos. The rear camera typically offers better resolution and clarity compared to the front-facing selfie camera, so using it will result in sharper, more detailed images. Devices like the latest iPhone models or flagship Android phones (Samsung Galaxy, Google Pixel) deliver excellent photo quality.
For added control, use built-in camera apps that allow manual adjustments such as exposure, focus, and white balance. Alternatively, consider third-party camera apps like Google Camera or Adobe Lightroom Mobile, which offer automatic enhancements and filters that can improve photo quality while preserving natural skin tones. These apps can help you achieve a polished and professional photo ready for official submissions.